Showing posts with label StyleArc. Show all posts

12 July 2019

Another Style Arc Lennie shirt


When I made my winter coat I had enough of the polyester I used for the lining to make a shirt and a dress.  I chose to make another Lennie shirt.  I really like this pattern, the length is just right.  This time I managed the front button placket much better and it turned out very well.

I swear this cat is the most vain creature, Sandy manages to get into just about every photo I take!


25 April 2019

Style Arc Jodie Pinafore

I made this Jodie pinafore from StyleArc in a striped denim.


The pinafore is pretty short, more a tunic really.  I made it with the intention of wearing leggings under it.  I'm not keen on the striped denim.  I feel from the front especially it looks too much like a butchers apron.

I made it in a size 14 which should be the correct fit according to the size chart, but it is very very snug around the hips.  I've started going regularly to the gym so hopefully I'll  lose a bit off my hips and maybe the fabric will stretch slightly when I wear it.  

Not really what I was after.  This will be for wearing around the house.


4 April 2019

StyleArc Lennie Shirt

I went shopping with some friends a couple of months ago.  One of the stores, H&M, had shirts in that we all really liked and one of my friends bought a top.  I've wanted to make a similar one.  I found the Lennie Shirt by StyleArc which was a close match for it, and some floral rayon from Smart Dress fabrics.

Here is my H&M knock-off.


I had bought 1.5m x 135cm of rayon.  This just wasn't quite enough.  So I used some blue linen from my stash for the placket, collar and sleeve tabs.  The inner collar was made using the rayon.  I'm actually quite pleased with the contrast the linen gives.
So the details
  • Made size 14, no changes.  Fits perfectly.  Next time just lower the bust darts 1".
  • Took 7 1/2 hours to sew.
  • The most challenging was the button placket.  I did this wrong, as I always do!  Next time, note that the placket should be sewn to the front raw edges together and at 3/8" seam allowance.  Sew placket to the wrong side of front, then turn placket to right side of front and top stitch down.  Check with how the pattern pieces fit together before sewing.
  • Next time get 1.75m of fabric if 135cm wide and if not using a contrast - I only needed enough extra to sew the sleeve tabs but just couldn't squeeze them out of 1.5m

29 November 2018

StyleArc Martha shirt

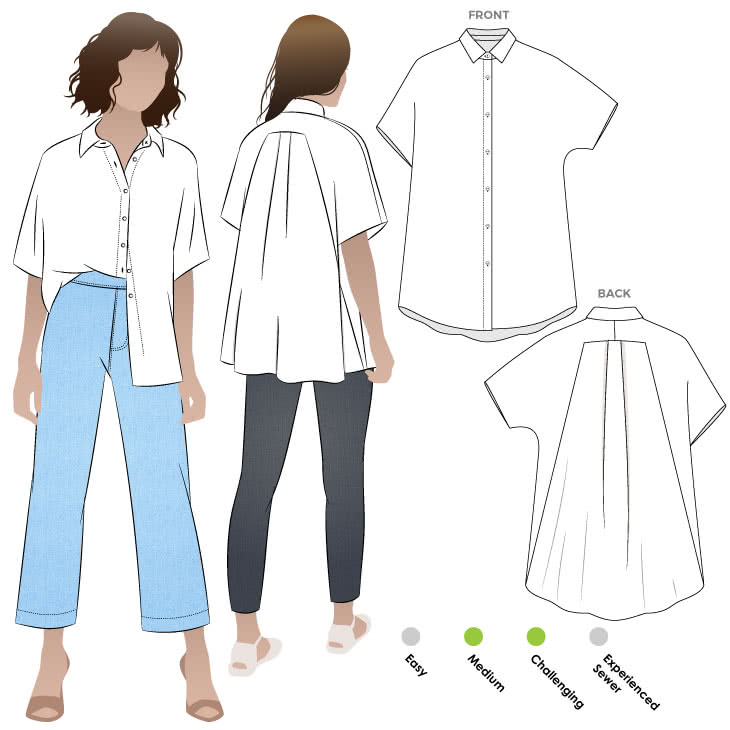
When StyleArc released their Martha shirt a few months ago I was intrigued by the pattern seaming at the back.

Martha Overshirt Sewing Pattern By Style Arc - Designer shirt featuring a swing back, extended shoulder and a neat shirt collar.
Their website describes it as: "Designer shirt featuring a swing back, extended shoulder and a neat shirt collar"

I knew I had to make it in a classic white poplin/cotton.


The pattern is rated medium/challenging. I assume this rating is due to the collar and collar stand as it was really very simple to sew.  If you've done a collar and collar stand before then that isn't difficult.  The sleeves are cut on, so no sleeves to sew in. The button placket is folded over, so no facings to add in.

The shirt is everything I hoped it would be.  It took me around 4 hours to sew it and used 1.5m x 148cm of cotton poplin from Spotlight,which just cost me $7.19

1 September 2018

Second pair of Airlie Pants

I made another pair of StyleArc's Airlie pants. 

This time I made a few alterations to the pattern.  I lengthened them by 2", did a 1/4" scoop on the back crotch for a low butt adjustments and added 1/4" to the upper thighs, shortened the elastic to a cut of 31 1/2".

These fit much better. You can see there are no tight wrinkles on the back of the legs.
Those pockets were again a problem for me.   The pants just took me 4 hours to sew but I spent 2 hours just on the pockets.  Here are some close ups.


With the pocket frustrations I'm not sure I'll make these again, I may stick with my TNT StyleArc Barb pants.


Last week I went to Home Ideas,  an exhibition centre where home improvement traders have stands.  I spotted this hand basin for the bathroom.
It's not really my 'thing', but nice to see some creative use being made of it.

A couple of weeks ago I bought a new car.  I wore all made by me clothing when I went to collect it from the showroom.
Itch to stitch Jacqueline Hoodie, Itch to stitch Uvita and StyleArc Barb pants.

26 August 2018

StyleArc Airlie pants

I've made a few of the StyleArc Barb pants which are recommended for bengaline, or stretch fabrics.  I've had success making these in bengaline, stretch cotton sateen and ponte.  They don't have any pockets though.  StyleArc recently released the Airlie pants that seemed similar but have pockets so I was keen to give them a try.

I swear I hadn't had a drop of alcohol, despite the drunken face!!!

They do look very similar to the Barb pants.  However when I made the Barb pants, unusually for me I had to shorten the legs by quite a bit.  I stupidly assumed the same would apply to the Airlie, so didn't check the length.  They are a bit short.  I ended up hemming with a 3/8"hem and even so they are too short.  I used the length of elastic recommended for the size I made, but find that they pull down when I sit, so next time I need to lengthen the legs and shorten the elastic.

The pockets were super fiddly.  The instructions given were hopeless and refer you to their tuition on youtube.  However the youtube video was terrible quality.  The audio was hopeless, I just couldn't make out most of what they were saying.  I gather the person sewing was the person who normally test sews their garments and is  a professional sewist.  However a professional sewist does not a teacher make.  She went too fast, trying to figure out how the fabric was manipulated from the video involved a lot of replays.  It took me an hour to do each pocket! However I am happy with the final result, albeit there is a tiny bit of puckering in the corner.

More shots


I should probably go up a size to get rid of those wrinkles at the back, but the fabric is so stretchy I don't think it will matter and it fits well across the butt.  I may just add 1/4" to the thighs and see if that makes a difference.

The fabric was only $6 bought online from Backstreet Bargains so for a cheap pair of pants it is a fair result.  I have some more bengaline in black so I'll make up another pair with alterations.

21 August 2018

itch to stitch jumper and sweatshirt and stylearc jumper

I still don't have my embroidery machine back from the technician.  There is another delay on it. This time, the Janome Australia don't have the part needed. This means they have to order it from their supplier in either Taiwan or Japan, the part needs to be sent to Australia and then Australia have to send to New Zealand.

This means I haven't been in to the shop to look at coverstitch machines yet.  As winter is nearly over I had made a couple of woolly snuggly jumpers that I want to have a chance to wear this year, so I gave in and sewed as normal on the sewing machine.  I still have 2 long sleeve laundry day T's that can be done on a coverstitch that are all sewn up just need hemming, but they are a lighter weight so I can still get some wear out of them in spring.

I had this lovely boucle type knit from SmartDress fabrics.  I bought 2 metres of it, as it was 150cm wide I had enough for two jumpers.

First was the StyleArc Winnie


Because it is a looser knit it has turned out a lot looser than the first one I did here. But I like it, it makes it feel super cosy.

The other one was the Itch to Stitch Visby Henly.

This has snuck in without me realising it as a TNT.  This is the 4th Henly I've made.

These 2 jumpers take no time at all to sew. About 1 1/2 hours each.

My next project was a more time consuming one.  I reckon this was around 10 hours.  There is a lot of detail in it which produces a nicer than a usual zipped up sweatshirt.  

This is the Itch to stitch Jacqueline hoody.


The jacket has a side zip, welt pockets and a lined hood. The photos don't show it, but it also has epaulettes. The pattern called for 20 buttons, but I just used 12, 2 are on the epaulettes. The fabric is sweatshirting from Morelands fabrics.  I decided to use black ponte for contrasting hem and sleeve bands, pocket welts, hood lining and hood binding.

Photo below shows the extension is nice and wide.


3 June 2018

3 tops and a cushion

I made another Itch to Stitch Visby Henly top.


Note to self: open eyes when taking selfie


 After all my mistakes on the last one I wanted to get it right.  I almost did. There are 2 pattern pieces for the placket interfacing.  One is longer if you want to make the hooded version, and a shorter one for the hoodless version.  The interfacing is ironed on to the top, you then stay stitch around it and cut down the centre.  I was making the hoodless version and can you guess what I did, yup I used the longer pattern piece instead of the shorter one.  Now if I'd realised in time I could have just made the placket longer, however I didn't realise until I had serged the placket in place.  So I had a placket and a gap of about an inch in the middle of the top!  Clearly something had to be done.  I managed to sew an extra length to the placket and then sew the large X in a box on top to hide the join.  It doesn't sit exactly right, but it is wearable.

This was made from a knit from SmartDress Fabrics, not sure what composition it was.

I also made another StyleArc Winnie top.  I love how quickly this one sews up.


This time instead of turning up the hem and doing a split hem, I left it at the same length and just did a normal hem.  This results in a longer top and I prefer thelength of this one.

This was made from a wool knit from SmartDress Fabrics.  I made a mistake (yes another one) when cutting the fabric.  I was cutting the above Visby Henly and the Winnie at the same time.  I cut the Visby Henly first and wondered if there was enough fabric left over to make a Itch To Stitch Lago tank (there wasn't).  So I then proceeded to cut out the Winnie from the blue knit.  It wasn't until I'd cut the front and back and thought I thought the funnel neck would be longer, and I looked at the pattern pieces and I'd cut the Lago tank instead of the Winnie.   This meant I no longer had enough fabric to make the Winnie.  Fortunately I had some black ponte in my stash so was able to use that for the sleeves.  I quite like the look of the contrast sleeves, so it worked out well.

This  mistake of course meant that I also had a Lago tank to make.

Once those tops were done I decided it was time for some machine embroidery. I've been wanting to make this reading pillow for a while.

The machine embroidery design is from Stitch Delight and says Today I will take the Time to stop and smell the Roses.

I used a 16" cushion form and made an envelope style back.  I'm making one for myself and one for a gift.


23 April 2018

StyleArc Winnie

I'm finally starting to sew again.  First up was StyleArc's Winnie funnel neck top for knits. 


This was incredibly quick to sew.  It took me 2 hours.  At least 1/2 hour of that was trying to get my twin needle to work to hem it.  I eventually gave up on the twin needle.  I am getting very tempted to buy a coverstitch machine.


It is very hard to see which is the front and which is the back once it's made up.  So I made my own label and added it.


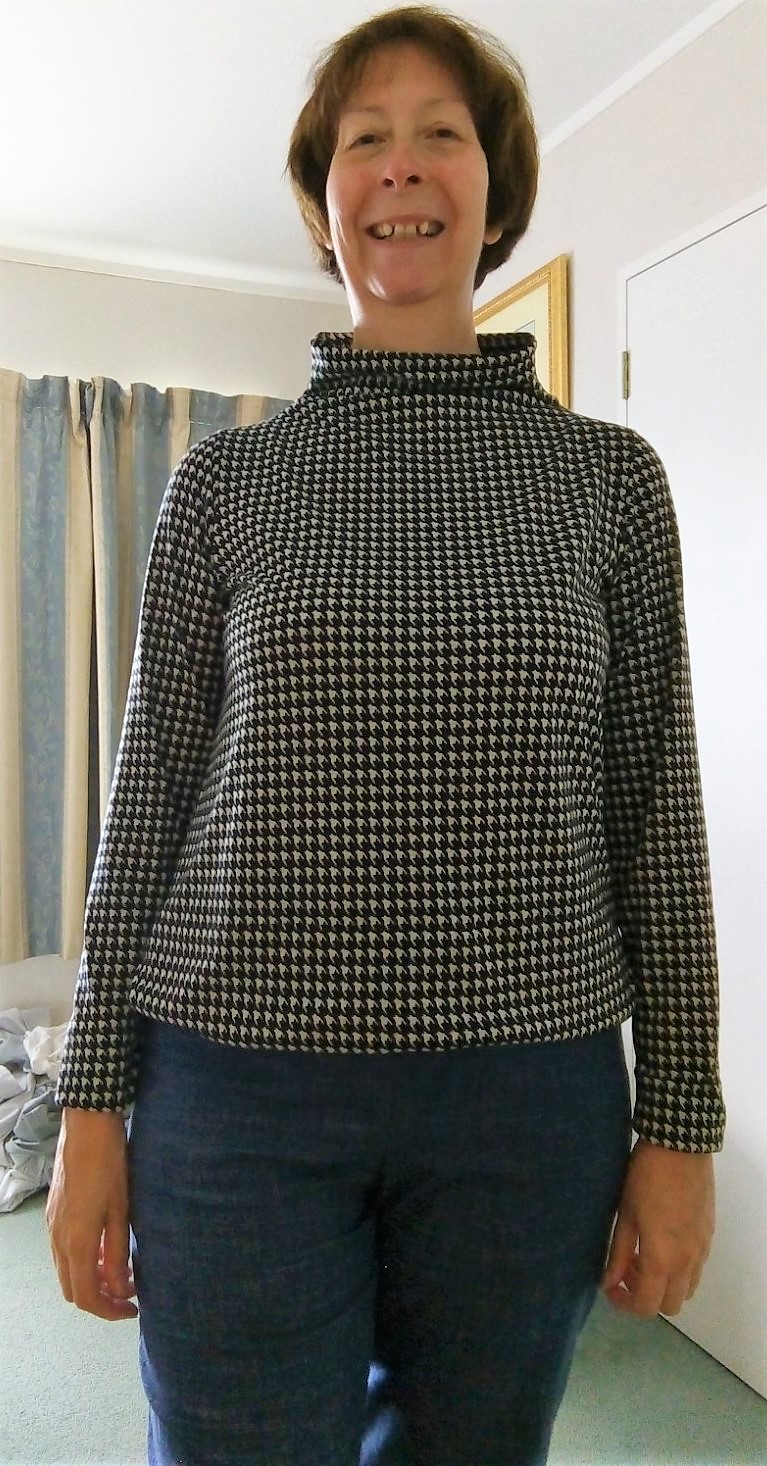
The knit fabric is very light weight and is probably a bit too light for a funnel neck, so it tends to end up drooping a bit.  But given how easy this is, I love it.  Plus I like the slightly higher neck that keeps my neck warm in the cooler weather without feeling strangled like a turtleneck does.

It has 3 inch hems at the sleeves and bottom.  Next time I'd just do it as a 1/2- 1" hem on the bottom as I'd like it a bit longer.

25 November 2017

Birthday gifts and Style Arc Luna pants

Friday was a very good friends 60th Birthday.  A special day and a special lady deserved some nice gifts.
 Bathrobe/Dressing gown.  Made from flanelette with feather design.  I made this pattern myself.
 Slippers and a sleep mask.  The slippers are a design from Stitch Delight.  I got the sleep mask pattern when I first started machine embroidery and I don't remember where I got it from.
Another Love Bear from Sweet Pea.  This was made in a fleece.

My friend was very happy with the gifts.

Meantime, for me it was time for another pair of Luna pants from Style Arc.  This time made in a bengaline.

This time the fabric isn't so busy  so you can see the topstitching of the faux fly and faux pockets.