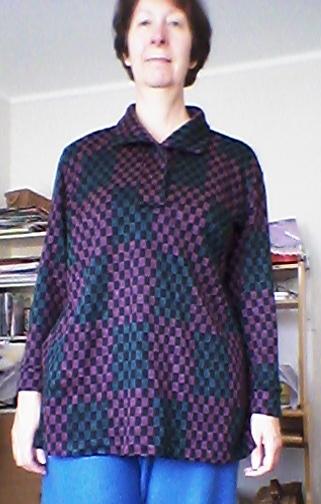
I've wanted a denim skirt for ages. I previously made this corduroy skirt from Burdastyle 10/15 #107.
This was made with a stretch denim. I made flat felled seams - my first time. I used a contrasting thread in a heavier weight topstitching thread to make them stand out as a decorative feature. The ordinary seams worked out OK, but I struggled with the centre fly and stitching down centre front. I had read when using a topstitch thread to use an ordinary weight thread in the bobbin and not to back stitch as that can cause birdnesting of the threads. Instead of back stitching start and finish with the smallest stitch length, and use a longer stitch for the remainder of the sewing. I used stitch length 1 for starting and ending and 3.5 for other stitches. However my machine struggled, especially around the fly and ended up with some very narrow stitches around the fly. It just couldn't cope with the bulk of fabric. I have my eye on a new machine where supposedly the feed dogs can cope with going over seams without altering the stitches. That would have really helped. I ended up undoing stitches on the fly and centre seam and redoing them, which hasn't created as tidy a look as I would have hoped. I really hope the seams don't give way when I start wearing it. Not as happy as I wanted, and I think the front pleats with denim probably haven't worked too well, a straight skirt would have been better.
However I now have a denim skirt.
24 August 2016
15 August 2016
Two tops and a bag, and Gossips cross stitch update.
I've been using the fabric bought at the hospice shop to make another couple of tops.
This is the second top I've made from BurdaStyle 1/19 #103A. See here for my first top.This time I used the patterned lace fabric from the hospice shop with some pink knit I got ages ago from Spotlight. The sleeves are meant to be the same fabric as the top part (the lace) but I wanted slightly warmer sleeves and also was concerned th lace would be too scratchy against my skin, so I used the pink for the sleeves as well.

This is the first time I've made a peplum top and I'm pleased with how it has turned out. The sizing is for a petite (5ft 3"). As I'm 5'9" I considered lengthening it, however the length given in the magazine seemed my usual length so I left it as is. On reflection though, it would have been better if I'd lengthened the bottom red band so it sits under the bust, as in the pattern photo, rather than under the bust. If I make it again I will lengthen that band by 2.5 - 3 inches.
It also is meant to have an invisible zip in the back. As this was a knit with a fair bit of stretch and a lowish front neck I didn't bother using the zip. It is easy enough to get on and off without the zip. However as it is quite fitted, if made with a firmer material, such as the cotton satin in the magazine, a zip would probably be needed.
The instructions were pretty hard to figure out. One of the descriptions was to turn the sleeve hems to the inside and sew one. Why would you only sew the hem of one sleeve? I naturally sewed both sleeves. Also the assembly of the peplum was pretty confusing, I managed through pinning in various ways and assembling on my dress form to make sure I was doing it correctly.
I am happy with the fit of this, it is nicely shaped with darts in the back and at the sleeve caps which give nice structure to it.
The other thing I've made is a new tote bag. I found this tutorial by the Missouri Quilt company and decided to make it. I had bought a sewing magazine a few months ago that came with some quilting fabric that I thought would be great for this.
I like pockets and closures, so I added 2 internal zipped pockets and a magnetic snap fastener.
Finally, an update on my Gossips cross stitch. I've now completed the first row- that is 9 pages out of 72.
This is the second top I've made from BurdaStyle 1/19 #103A. See here for my first top.This time I used the patterned lace fabric from the hospice shop with some pink knit I got ages ago from Spotlight. The sleeves are meant to be the same fabric as the top part (the lace) but I wanted slightly warmer sleeves and also was concerned th lace would be too scratchy against my skin, so I used the pink for the sleeves as well.

I have enough lace left over for another top. total fabric cost $8.
The second top was the first time I've made this from BurdaStyle 2/16 #122a.
This is the Burda photo.
And here is my version.
It also is meant to have an invisible zip in the back. As this was a knit with a fair bit of stretch and a lowish front neck I didn't bother using the zip. It is easy enough to get on and off without the zip. However as it is quite fitted, if made with a firmer material, such as the cotton satin in the magazine, a zip would probably be needed.
The instructions were pretty hard to figure out. One of the descriptions was to turn the sleeve hems to the inside and sew one. Why would you only sew the hem of one sleeve? I naturally sewed both sleeves. Also the assembly of the peplum was pretty confusing, I managed through pinning in various ways and assembling on my dress form to make sure I was doing it correctly.
I am happy with the fit of this, it is nicely shaped with darts in the back and at the sleeve caps which give nice structure to it.
The other thing I've made is a new tote bag. I found this tutorial by the Missouri Quilt company and decided to make it. I had bought a sewing magazine a few months ago that came with some quilting fabric that I thought would be great for this.
I like pockets and closures, so I added 2 internal zipped pockets and a magnetic snap fastener.
Finally, an update on my Gossips cross stitch. I've now completed the first row- that is 9 pages out of 72.
Most of this is sky which doesn't show up very well in the photo.
29 July 2016
Easy dress BurdaStyle 3/16 #105
I had some crazy print knit fabric from SmartDress Fabrics that I loved. I've had it for a while and couldn't decide what to make with it. The March 2016 issue had this in it:
When I first saw it in the magazine I really wasn't interested. However there was a one on Pattern review which I liked. It has a big pleat in the back which I really liked for a style factor. It is almost 2 dresses in one. The underneath part has the bodice made from lining and attached to the top bodice layer as a lining at the shoulders and armholes. It could easily be made as separates, though I made it as instructed. I think it would be nice as separates. Instead of using lining for the under bodice, normal fabric could be used and a separate top could be used as a cover for the dress for cooler evenings.
I made my usual size 42 (Burda sizing - eek, makes you sound enormous). I did find it to be quite loose fitting, not as tight as I imagined.
Anyway here is my finished dress. I don't think the photos do it justice as it is hard to see the separate top and skirt so it looks a bit dowdy. Trust me, it is much better in real life.
When I first saw it in the magazine I really wasn't interested. However there was a one on Pattern review which I liked. It has a big pleat in the back which I really liked for a style factor. It is almost 2 dresses in one. The underneath part has the bodice made from lining and attached to the top bodice layer as a lining at the shoulders and armholes. It could easily be made as separates, though I made it as instructed. I think it would be nice as separates. Instead of using lining for the under bodice, normal fabric could be used and a separate top could be used as a cover for the dress for cooler evenings.
I made my usual size 42 (Burda sizing - eek, makes you sound enormous). I did find it to be quite loose fitting, not as tight as I imagined.
Anyway here is my finished dress. I don't think the photos do it justice as it is hard to see the separate top and skirt so it looks a bit dowdy. Trust me, it is much better in real life.
23 July 2016
Barb pants for gym, Kwiksew plaid shirt
I've got another 2 makes for this post.
The first was a very quick make. Made from leftover fabric, a green ponte, I made some pants to wear at the gym. These are using StyleArc's Barb pattern, but shortened so they end just below the knee.
I've worn them a couple of times to the gym now and they are great, very comfortable.
For a long time I've wanted a long sleeve plaid flannel shirt. My go to New Look6963 shirt pattern doesn't come with a long sleeve, otherwise it would have been perfect. So I had to look for another pattern. I found this one by KwikSew 4133.
It is possible to make this without the fancy yoke, as the front piece in contrasting fabric is sewn on top of the main fabric. However I had some blue chambray left over from a previous project that I decided to use.
The one thing I don't like about this pattern is it has snap fasteners down the button placket and on the sleeves. I would prefer buttons. The way they have you make the button placket is like a bias binding, so is 5 layers of fabric, 6 where the yoke is. I experimented with scraps of fabric to see if my sewing machine could manage buttonholes with this thickness, but it couldn't so I had to go with the snap fasteners and I sewed buttons on top of the placket to give the illusion on real buttons.
Apart from the fastening I like this shirt. If I make it again I would probably do it without the fancy yoke and I would try to find another way of making the placket so I could do buttons/buttonholes.
The first was a very quick make. Made from leftover fabric, a green ponte, I made some pants to wear at the gym. These are using StyleArc's Barb pattern, but shortened so they end just below the knee.
For a long time I've wanted a long sleeve plaid flannel shirt. My go to New Look6963 shirt pattern doesn't come with a long sleeve, otherwise it would have been perfect. So I had to look for another pattern. I found this one by KwikSew 4133.

It is possible to make this without the fancy yoke, as the front piece in contrasting fabric is sewn on top of the main fabric. However I had some blue chambray left over from a previous project that I decided to use.
The one thing I don't like about this pattern is it has snap fasteners down the button placket and on the sleeves. I would prefer buttons. The way they have you make the button placket is like a bias binding, so is 5 layers of fabric, 6 where the yoke is. I experimented with scraps of fabric to see if my sewing machine could manage buttonholes with this thickness, but it couldn't so I had to go with the snap fasteners and I sewed buttons on top of the placket to give the illusion on real buttons.
Apart from the fastening I like this shirt. If I make it again I would probably do it without the fancy yoke and I would try to find another way of making the placket so I could do buttons/buttonholes.
9 July 2016
BurdaStyle jumpers
I've made another 2 jumpers from BurdaStyle magazines.
The first was from 9/2015 issue from the plus size section #134.
And yet another one from 11/15 issue # 112, the zip shoulder jumper.
Total cost for the 2 jumpers was $2.70.
The first was from 9/2015 issue from the plus size section #134.
And yet another one from 11/15 issue # 112, the zip shoulder jumper.
The ribbon on the zip shoulder looks blue here, but it is a dark green.
As you can see, they are both the same fabric. A while back I blogged about my wonderful find at a hospice shop. This fabric was labelled as approximately 2.5metres. Well I think it was more like 3 to 3.5 metres, and I had plenty for both the oversized pullover and my new favourite the zip shoulder jumper.
The first pullover is a plus sized jumper with a press stud at the neck and with a polo shirt type collar and gussets under the sleeves. It has pockets in the side seams and slits at the side seams and also at the cuffs. My top half is usually a size 42 with Burda, but the plus sizes start at 44. As this is an oversized sweater anyway, I didn't bother changing it down. I'm really happy with this. It will do as a lounging around the house type sweater, and I always like pockets in a top to carry an emergency tissue. The photo of the back looks as though it has a pleat, but it doesn't. I didn't notice this when I took the photo and can't be bothered re doing the photo.
I did make a mistake with the collar. The instructions read "stitch along front band edges and collar edge. " I took this to mean the short ends of the collar as well. However when I came to the instruction that said "insert bottom ends of bands" I realised that by stitching the ends of the collar I had no seam allowance left to insert it and attach to the jumper. I had to fudge it by trying to stretch out the left collar piece and attach that to the jumper, then stitch the right side of the collar on top of the left side. I was annoyed with myself, but no one else will probably notice and I know for the next time I do another collar like this.
Total cost for the 2 jumpers was $2.70.
24 June 2016
3 tops: kwiksew 3678, BurdaStyle 11/15 112
I've made another 3 tops in the last 10 days. Another sweatshirt jacket from Kwiksew 3678 and 2 shoulder zip jumpers from BurdaStyle 11/15 112
The sweatshirt is made from a husky steamed velour from Spotlight. I needed 1.25m x 147cm wide. the amount I actually had was 1.75m so a little bit left over.
I love the 2 jumpers. The shoulder zip adds a bit of style. I made size 42, graded to 44 at the hips, added 2" to the length and did a 1/2" narrow shoulder adjustment.
I'm particularly proud of my pattern matching on the black, red and green jumper. It was a nightmare to pattern match as the stripe went in one long diagonal line from selvage to selvage. I concentrated on getting the matching through the back centre seam and across the shoulders and top of sleeves, thinking these would be the most visible. Due to the large pattern I couldn't manage to match those areas and the side seams.
The pattern calls for petersham ribbon. The only colours I could find in this were black or white and I knew I wanted colours. For the purple jumper I used a yellow grosgrain ribbon, and for the stripey jumper used a satin ribbon.
The instructions are presented in the magazine as a step by step sewing lesson so are easy to follow, though I don't think there was anything difficult anyway. The instructions are to put stay tape on neck edges and the right front shoulder. I did this for the purple jumper as it is a firm knit, but the striped fabric is very fine so I added stay tape to both front and back of both shoulders for stability, especially for the left shoulder as I wanted extra stability for the zip.
More photos of the purple jumper. The colour doesn't show very well, it is a deep purple in real life.
I wore the striped jumper yesterday for lunch with friends and had compliments on it. I like the fact that the neck is reasonably high, so keeps my neck warm, but not as high as a polo neck which I usually feel are too constricting. I have a feeling this could be a favourite piece.
Fabric for both of these tops was from SmartDress fabrics in Mt Albert and I had 1.5m x 147cm of both and both cost $14.93.
I have some more wool in my stash so I will spend this afternoon looking through my magazines trying to decide whether to make another of these tops or try something different.
11 June 2016
StyleArc Barb pants, KwikSew 3678 and quilt block
I got yet another pair of StyleArc Barb pants completed. I think this is my 5th pair now. These are in a mustard coloured ponte from Spotlight.
I also made a sweatshirt and pants using KwikSew 3678.
I made this using a husky polar fleece from Spotlight. It is a very warm fleece so should be good when the colder weather arrives. Though the other day it got to 20C in Auckland, still warm for middle of winter!
The pant legs are all in one piece, so the only seam to join is the inner leg and crotch. The pants have an elastic waist and the pattern has to add a cord, I didn't bother with the cord. The elastic is enough to hold the pants up, so fastening and unfastening the cord would just annoy me when I need to take a bathroom break. The pants have back pockets, and the jacket has kangaroo pockets. The zip sits nicely in a facing so only the teeth show, no tape is visible on this inside of the jacket.
As I could do most of the sewing on my overlocker it sewed up quite quickly. Most of the time sewing these was spent on the pockets and facing.
Side and back views:
I've also experimented with another quilt block. I like this design which is a free design on lilysquilts blog.
At the moment I just have it set to one side, until I decide what to do with it. I'm trying making blocks as I really like home made quilts. The ones I prefer are where the blocks are the same. This one creates quite an interesting pattern when blocks are joined. A google search found this image:
I love how the corner blocks create another smaller square block when they are all joined.
My concern is that I will get bored making the same block over and over, so I can't decide whether to make one or not. Plus the cost of material and batting isn't cheap, so before I make those purchases I need to be sure it's something I'll not get fed up and abandon halfway through.
My next project will be another KwikSew jacket in velour. I've washed the fabric today so should get it sewn later this week.
Subscribe to:
Posts (Atom)